
This article was originally published in 2003 on the Seasalter Sailing Club website by Martin Searle and is republished here by him.
Background :
Laser have recently replaced the design of the trampoline tracks on the Sprint 15 to match that of the Dart 18. They have also adjusted the design of the trampoline so that it fits the new tracks. According to laser the old trampolines are not able to be fitted to the new tracks, although they do seem to fit but the bolt rope is a little bit on the small side so perhaps getting a sailmaker to fit a wider diameter bolt rope to the trampoline may work (but don't quote me on that !).The trampoline on my Sprint 15 gave up the ghost last season and the Tramp. Tracks were also in a pretty dire condition. The port side track had broken in 1999 whilst I was out sailing, the first two rivets had sheared off. So I decided to replace the Tracks and Tramp. Here's how I did it :
Tools Required :
- Drill
- Pop Rivet Gun
- Wet and Dry Sandpaper
- Gel-coat filler compound
- Rivets
Parts Required :
- 2 x Sprint 15 (2000) Tracks (Laser don't make the previous track style anymore, the new tracks are similar to the Dart 18 tracks)
- 1 x Sprint 15 (2000) Trampoline
- 4 x Track End pieces
- 2 x Jib Fairlead Adjusters
You won't get much change from £450 for the above list !.
2007 Note:
You can buy all the necessary parts from Windsport International, they will sell you a kit to replace the tracks!Step 1 : Removing the Old Tracks
After removing the trampoline from the boat you are ready to remove the old tracks.
To remove them you must drill out the old rivets. I started in the middle and worked my way to either end systematically, this ensures that the track doesn't twist or buckle when removing it. After the rivets have been drilled out the track should come off very easily, although if there is some sealant compound underneath then you may have to gently coax it off.
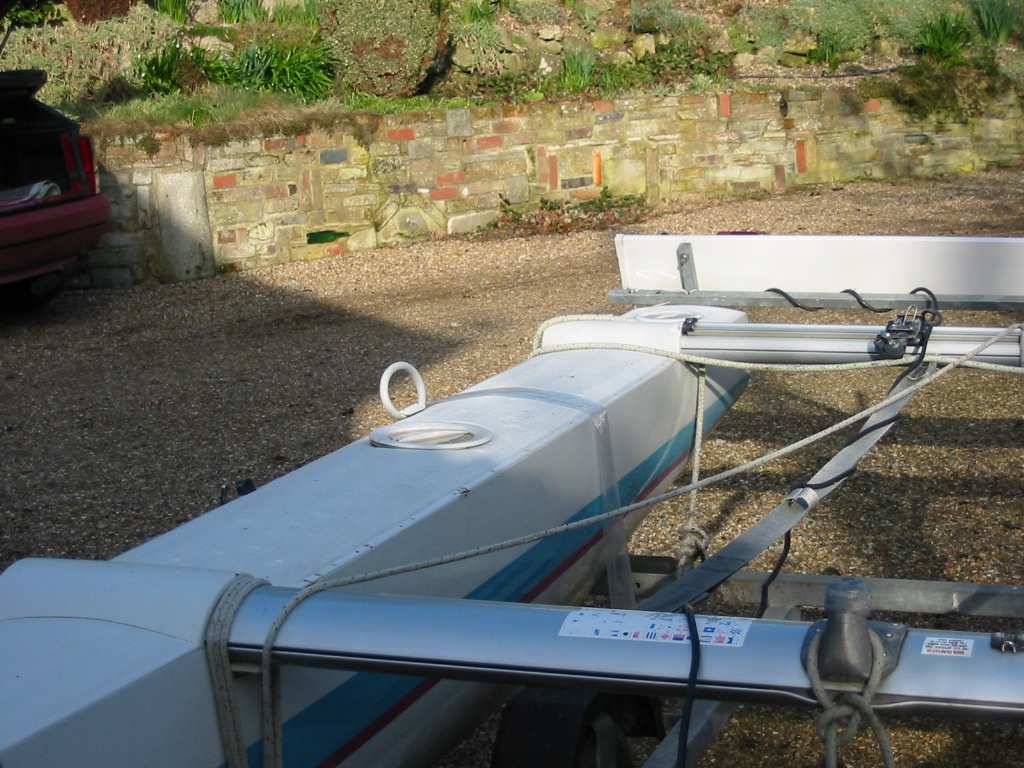
In the above photo. you can see the boat with the track removed from the starboard side, the plastic bag draped over the boat covered the new track that has been installed on the port side.
Step 2 : Repairing any Hull Damage
I found some damage to the sides of the boat where the tracks had been, also I had added some extra rivets at the bow end to strengthen the fixing there after the port side track failed at this point. So I gave them a light sanding with the wet and dry paper and filled any damaged areas with gelcoat filler compound.

The photo above shows the port side at the bow. This is where the old track had failed after shearing the rivets at the bow. You can see old repairs that have been patched and also some old rivet holes that have been filled with gelcoat filler compound, I added these to add more strength to this area. Leave the compound to dry, since I was doing this over a number of weekends I choose to leave it until the following weekend.
The next step is to sand the newly filled areas so that they are smooth and are not raised above the deck line. This ensures that the new rail will be able to sit properly on the deck.
Step 3 : Fitting the track in place
Once the areas where the tracks are to sit is smooth you can now fit the new track in place. I first did a dry fit to make sure that all the rivets could be inserted into their respective holes in the track and hull. I found that I had to slightly widen the holes in the track to match my rivets, the holes in the deck were of the correct diameter, but make any adjustments to the track and not the hull ! the last thing you want to do is widen the holes in the deck. Once happy with this fit, remove it and apply a bead of silicone sealant to the deck where the track sits, this will apply a watertight seal and also it will provide some extra stickiness to ensure that the track stays where its put !!.
Also put some tape opposite where the standard jibsheet positions are, this allows you set a base level position for the jib fairlead adjusters.
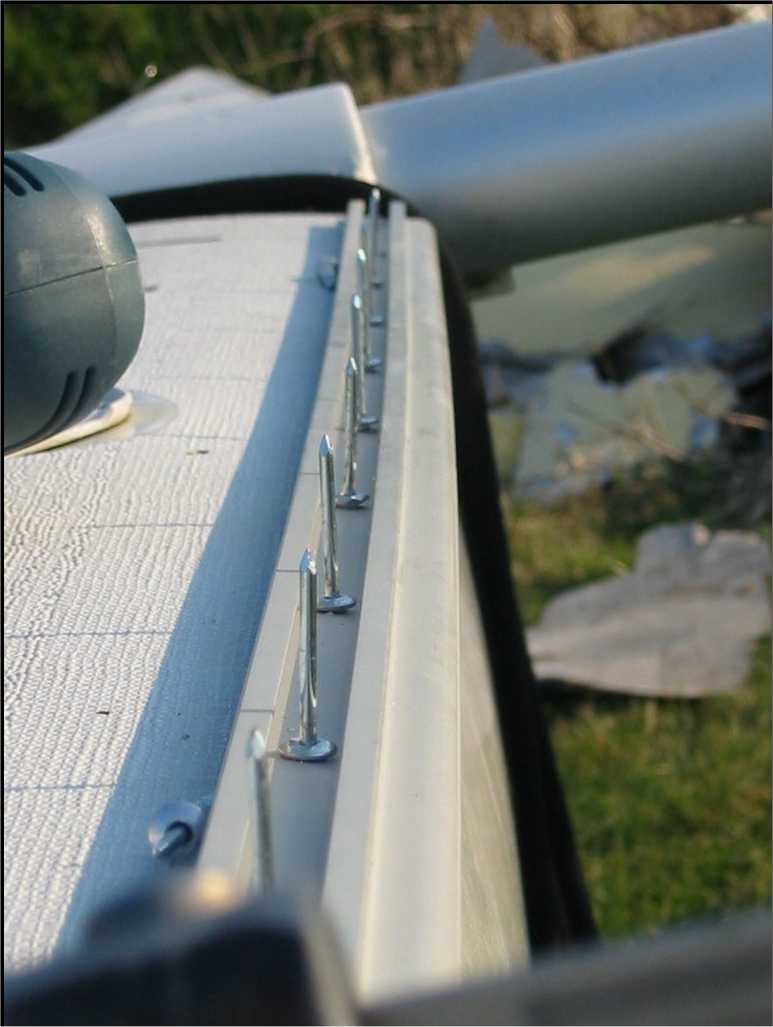
The photo above shows the port track in place with the sealant applied it is now ready for riveting. Note the slight curve in the track this is correct but it does make the end rivets fairly awkward to secure in place. I used 17mm rivets but I would advise perhaps using 20mm rivets for extra security.
Step 4 : Riveting
This step is pretty simple, I worked from the stern to the bow riveting each one in turn. One thing to watch for is that occasionally the riveters head gets stuck in the rail at the top of the track, so be careful not to damage the rail when this occurs.
Step 5 : Finishing off
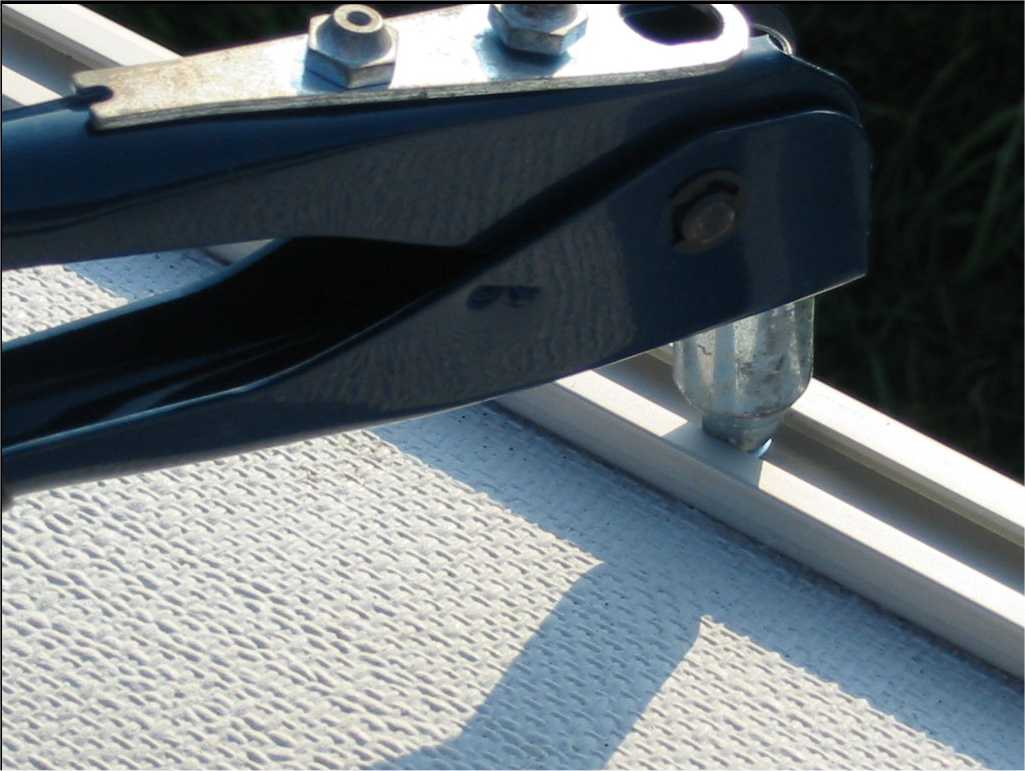
Insert the Jib Fairlead Adjusters into the rail and set them to the position you marked with tape this gives you a good starting point.
Finish off the track by riveting in place the track end pieces (use 20mm rivets for this). You will have to drill a new hole in the deck and track for the end piece so ensure that you mark everything up properly.
Once done you can then install the trampoline and get ready for some sailing !!! Just to satisfy myself I stood up on the trampoline and did a few test bounces and shock loads since the last thing I wanted was for something to give way whilst out on the water !.

Here is the finished article on my boat. Good Luck if you try this ! and remember if you get stuck call in a professional (not me!).
Martin Searle
(Sprint 15 1331).
Note This has survived for the last 3yrs with only 1 rivet having to be replaced after shearing. So all in all I can vouch that the above works well.

